2025 Asphalt Shingle Installation: Step‑by‑Step DIY Guide (With Safety Tips)
Thinking about installing asphalt shingles on your own roof in 2025? I’ve been there. It’s satisfying, budget-friendly, and—if you know what you’re doing—something any confident homeowner can tackle with the right tools, preparation, and safety mindset.
Let me walk you through this comprehensive DIY guide that’s based on actual experience—not just theory. Whether you’re replacing a few damaged shingles or giving your roof a full refresh, this is your go-to playbook.
Why Asphalt Shingles Are Still King in 2025
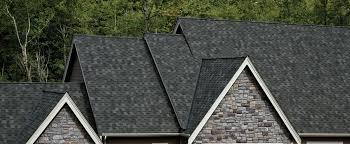
Asphalt shingles remain a top choice because they’re affordable, durable, and relatively easy to install. Bonus: They look great on just about any home style. Here in South Carolina, they’re especially popular due to their resistance to humidity and moderate storms.
Still deciding on the right roofing material? Check out our guide to asphalt shingles and see why they remain a homeowner favorite in 2025.
Tools & Materials You'll Need
Before climbing up the ladder, prep your gear. Here's what you’ll need:
Roofing nails
Roofing hammer or nail gun
Roofing underlayment (felt or synthetic)
Starter strip shingles
Asphalt shingles (3-tab or architectural)
Roofing adhesive/sealant
Chalk line
Utility knife
Pry bar
Roofing harness, ladder, and safety gear
Pro Tip: Always check the local building codes or HOA guidelines—some areas have specific requirements or limitations on shingle type or color.
Step-by-Step Installation Guide
1. Tear Off the Old Roof
If you're not layering over an existing roof (which isn't always recommended), start by stripping the old shingles using a roofing shovel or pry bar. Clear all debris and inspect the decking for any rot or damage.
If you’re unsure about the condition of your roof deck or just want a second opinion, schedule a residential roof inspection with pros like us at Artigues Roofing.
2. Install Drip Edge & Underlayment
Place drip edge flashing along the eaves to direct water away. Roll out your underlayment, overlapping each row by a few inches and securing with cap nails or staples.
3. Chalk Line for Accuracy
Use a chalk line to snap horizontal guides every 5 inches up the roof—this keeps your rows straight and aligned.
4. Starter Strip Matters
Install a starter strip along the eaves. You can either buy pre-made starter shingles or trim off tabs from regular shingles. This layer prevents water from seeping under your first full course.
5. Lay Down Shingles
Now for the main event—starting from the bottom, lay shingles row by row. Nail them just under the adhesive strip, making sure each row overlaps the one below it.
Don’t rush this part. Proper nailing and alignment mean the difference between a roof that lasts 10 years and one that lasts 30.
6. Cap the Ridge
Once you’ve reached the top, install ridge cap shingles to protect the roof’s peak. These are usually pre-cut or can be made from 3-tab shingles.
Bonus: Advanced Safety Tips (Because Roofing is No Joke)
DIY doesn’t mean unsafe. Roofing accidents are real, and in my experience, here’s what every homeowner should keep in mind:
Use a harness – Even if you’re confident.
Work early – Morning work avoids the harsh afternoon sun.
Don't rush – You’ll get more done in two careful days than one risky day.
Ladder safety is non-negotiable – Make sure it’s on level ground and always secure the top.
When to Call in the Pros
Even seasoned DIYers sometimes need backup. If you spot severe decking damage, complex roof angles, or just don’t feel 100% confident—get help. Trust me, there’s no shame in calling the pros before something goes sideways.
If you’re in South Carolina, our team at Artigues Roofing provides high-quality roof installation and repair, plus free inspections to ensure you're on the right track.
Final Thoughts: Should You DIY Your Roof in 2025?
You absolutely can install your own asphalt shingles—if you're patient, prepared, and prioritize safety. But know when to call for backup, and don’t underestimate the power of proper planning.
And if you want to compare your work with how it should look, take a look at our past roofing projects for a little inspiration and validation.
Bonus Resource Roundup
Want to go deeper into your DIY roofing journey? Here are some helpful reads from our blog:
Need help or a second pair of eyes? Contact Artigues Roofing for a free consultation or inspection—whether you're stuck midway or just want to double-check your handiwork.
Stay safe, stay smart, and happy roofing!
Written by someone who's dropped a shingle on their toe once and learned the hard way so you don’t have to.