How to Install a Roof Like a Pro: Step-by-Step Breakdown
Introduction
Installing a new roof is one of the most critical—and complex—projects in home maintenance, directly impacting your property’s protection, energy efficiency, and curb appeal. According to the National Roofing Contractors Association (NRCA), a properly installed roof can reduce energy costs by up to 15% and extend the lifespan of HVAC systems by mitigating heat transfer.
Tools, Materials & Safety Gear
Tools You'll Need
Chalk line & measuring tape
Utility knife
Roofing shovel
Tin snips
Ladder, roof jacks, harness
Materials Checklist
Drip edge
Flashing
Starter strip
Roofing nails
Sealant/roofing cement
Safety First
Safety harness and anchor system
Hard hat
Gloves
Non-slip boots
Eye protection
OSHA requires fall protection for anything over 6 feet high—don’t play games with gravity.
Key Takeaways: A professional-grade roof install typically unfolds in 6–10 phases—from stripping off the old covering and inspecting the deck, to installing underlayment, drip edge, flashing, shingles, and ridge caps, then finishing with cleanup and a final inspection. Skipping or botching any of these steps (especially flashing, underlayment, or starter shingles) is a leading cause of leaks and premature failure.
Roof Installation Step-by-Step
Step 1: Tear Off the Old Roofing
Begin by removing existing shingles or panels down to the decking. This step is vital to inspect the underlying structure for any damage. If you're unsure about the condition of your roof, consider our Residential Roof Inspections service to get a professional assessment.
Step 2: Inspect & Repair the Decking
After removal, inspect the decking for rot or damage. Replacing compromised sections ensures a solid foundation for your new roof. Our Roof Replacement services guarantee a sturdy and reliable roofing system.
Step 3: Install or Replace Flashing
Flashing prevents water from seeping into vulnerable areas like chimneys and vents. Proper installation is key to avoiding leaks. Learn more about our Roof Repair solutions to address any flashing issues.
Step 4: Add Drip Edge
Installing a drip edge directs water away from the fascia and into the gutters, protecting the underlying wood. This small addition plays a significant role in prolonging your roof's lifespan.
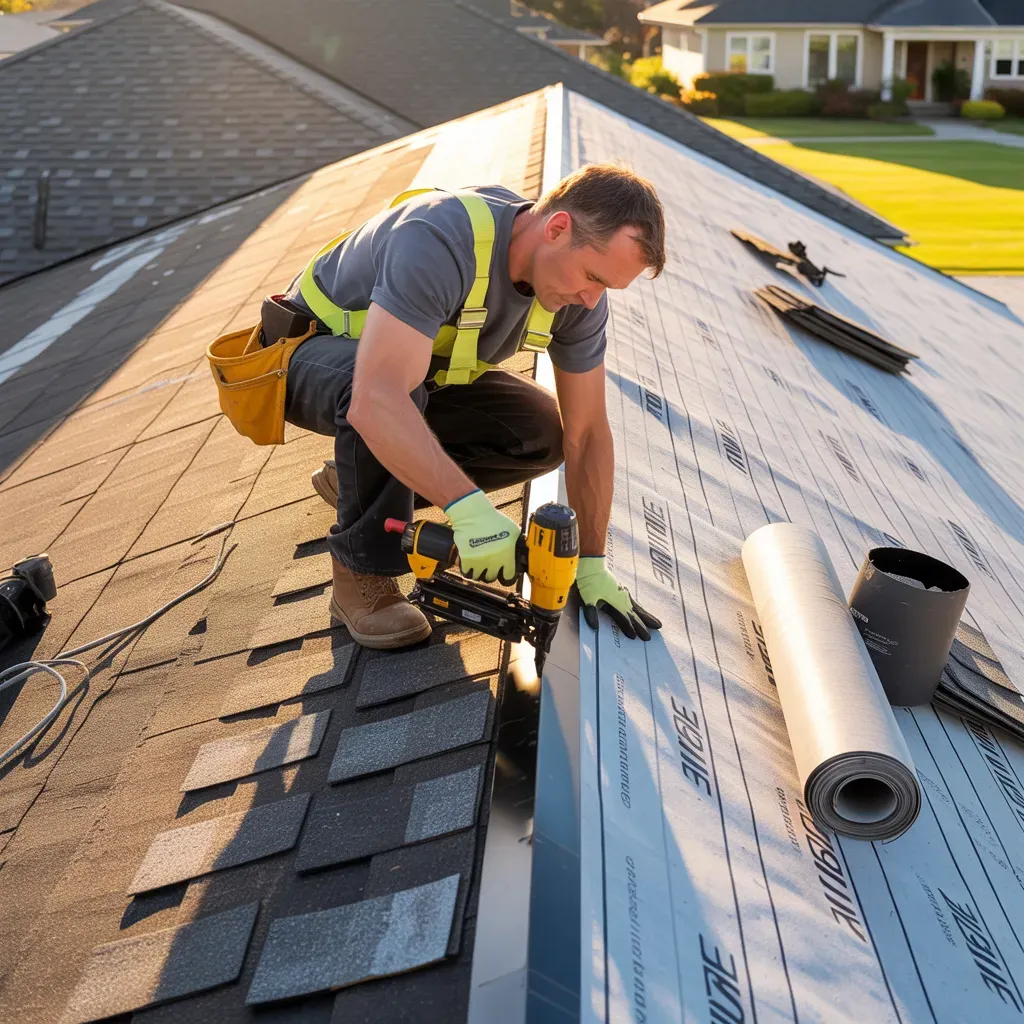
Step 5: Lay Down Underlayment
Underlayment acts as a secondary barrier against water infiltration. Choosing the right material is essential for optimal protection. Our Roof Installation experts can guide you in selecting the best underlayment for your home.
Step 6: Apply Starter Shingles
Starter shingles provide the initial layer of protection and ensure the rest of the shingles align correctly. Proper placement is crucial to prevent water penetration.
Step 7: Install the Main Shingles or Panels
Lay the primary roofing material, ensuring each piece is securely fastened. Whether you prefer asphalt shingles or metal panels, our Roof Types page offers insights into various options to suit your preferences.
Step 8: Cap the Ridge
Ridge caps seal the roof's peak, preventing water from entering and giving your roof a finished look. This step is vital for both functionality and aesthetics.
Step 9: Vent Installation & Finishes
Proper ventilation regulates attic temperature and moisture levels, extending your roof's life. If your area experiences frequent storms, our Storm Damage Roofing services can help assess and repair any damage.
Step 10: Cleanup & Final Inspection
After installation, ensure all debris is cleared, and the roof is thoroughly inspected. For emergency situations, our Emergency Roofing team is ready to assist promptly.
Bonus Pro Tips:
Always follow manufacturer instructions. That’s what warranties are built on.
Cut corners on materials = replace your roof in 5 years. Spend the money upfront.
Don’t roof in extreme temps. Too hot or too cold and your materials won’t seal or flex properly.
Have help. Roofing solo is a great way to break something—probably your neck.
Common Pitfalls & Pro Tips
Don’t let rookie mistakes blow off your investment. Here are the five biggest slip-ups that turn a pro-level roof job into a dumpster fire—and exactly how to dodge them.
1. Reusing Old Flashing
Mistake: Salvaging old metal flashing around chimneys, vents, and skylights to “save a buck.”
Reality: Old flashing loses its shape and sealant, leading straight to leaks at critical junctions.
Pro Tip: Always install new, manufacturer-rated flashing. Use corrosion-resistant roofing nails and bead a high-quality sealant under every flange.
2. Improper Underlayment Installation
Mistake: Skipping overlaps, stapling too sparsely, or using cheap felt instead of synthetic underlayment.
Reality: Underlayment is your second line of defense—poor installation means water wicks under shingles and rots decking.
Pro Tip: As noted in a Building Science Corporation study, improperly installed underlayment accounts for 34% of premature roof failures. High-quality synthetics, such as Owens Corning’s ProArmor®, provide superior moisture resistance.
3. Exposed or Incorrectly Driven Nails
Mistake: Leaving nail heads proud of the shingle surface or angling nails wrong.
Reality: Exposed or misdriven nails are like open portals—water finds those cracks and sneaks right in.
Pro Tip: Use the correct nail length (penetrate decking by ¼″) and drive straight—flush with the shingle, never over- or under-set. If you see any nail head peeking, pull and redo it.
4. Ignoring Roof Ventilation
Mistake: Treating vent placement as an afterthought or leaving soffits and ridge vents off.
Reality: Poor airflow traps heat and moisture, leading to ice dams in winter, warping in summer, and mold in between.
Pro Tip: The U.S. Department of Energy (DOE) advises a balanced attic ventilation system (1 square feet of vent per 150 square feet of attic space) to prevent ice dams and reduce cooling costs by up to 10%.
5. Using Mismatched or Damaged Shingles
Mistake: Mixing shingle batches or reusing leftovers from old roofs.
Reality: Different production lots can vary in color and granule adhesion—plus, old shingles have already lost UV protection.
Pro Tip: Buy all shingles from the same manufacturer, color line, and production batch. Store them flat, in the box, off the ground until you’re ready to lay them.
Cost Breakdown & Timeline
Getting your budget and schedule dialed in upfront keeps surprises—and sticker shock—to a minimum. Below is a ballpark of what you’ll spend and how long each material takes to install.
Material & Labor Costs (per sq ft)
Asphalt Shingles: $3.40 – $8.75 (material)
Metal Roofing: $7.00 – $14.00 (material)
Clay/Concrete Tile: $11.00 – $19.80 (material)
Slate or Synthetic Slate: up to $35.00 (material)
Labor: $3.00 – $7.00 (per sq ft)
Example: A 2,000 sq ft roof with asphalt shingles
Material: 2,000 × $4–$9 = $8,000–$18,000
Labor: 2,000 × $3–$7 = $6,000–$14,000
Total: $14,000–$32,000
Smaller roofs and simpler pitches lean toward the low end; steep or complex roofs push you higher.
Pro Tip: Weather delays (rain, high winds) and permit lead times can tack on 1–3 extra days—plan accordingly for your local climate and council requirements.
Costs vary by material and region. The Remodeling Magazine’s 2023 Cost vs. Value Report estimates a national average ROI of 62% for asphalt shingle roof replacements.
By mapping out costs and timing before you break ground, you’ll avoid mid-project sticker shock and ensure your crew (or your DIY schedule) runs like a well-oiled machine. Next up: actionable Conclusion & Next Steps, with links to maintenance checklists and advanced How-To.
Conclusion & Next Steps
You’ve now got the full playbook for a killer roof install—from teardown to final nail. Here’s how to keep that investment solid and leverage your new skills (or impress your contractor):
Schedule Routine Inspections
Biannual Checks: After winter and at summer’s end, scan for loose shingles, clogged vents, or early signs of wear.
Storm Spot-Checks: Post–heavy wind or hail, look for missing granules or dented metal.
Maintain Your Roof System
Gutter Cleaning: Clogged gutters back up water under your drip edge. Clean them every spring and fall—here’s our Ultimate Gutter Care Checklist.
Flashing & Sealant Refresh: Sealant degrades over time. Reseal around chimneys, vents, and skylights every 3–5 years.
Level Up with Pro How-Tos
Skylight Installation Guide: Boost natural light without compromising waterproofing (/skylight-installation).
Solar Panel Retrofit: Future-proof your roof for clean energy (/solar-panel-roof).
Cold-Climate Ice Dam Prevention: Insulate and ventilate like a champ to nix ice dams (/ice-dam-prevention).
Stay Informed & Share Your Wins
Bookmark our Home Improvement Hub for fresh tips.
Snap pics of your project and tag us on Instagram @RoofRookies—let’s see that flawless ridge cap angle.
Final Pro Tip: A roof’s lifespan hinges on the details—quality materials, precision installation, and routine care. Nail those, and you’ll be chillin’ under a watertight fortress for decades.
For personalized assistance or to schedule a consultation, don't hesitate to Contact Us. Our team at Artigues Roofing is here to ensure your roofing project is a success from start to finish.
Additional Resources
Explore more insights on our Roofing Blog.
Learn about our Atlas Partnership and how it benefits you.
Considering financing? Check out our Financing Options.
Serving areas like Summerville, Charleston, Mount Pleasant, and Isle of Palms.
2025 Asphalt Shingle Installation: Step-by-Step DIY Guide (With Safety Tips) — Your go-to playbook for DIY asphalt shingle work in 2025.
Metal Roofing Explained: Types, Benefits, and Installation Guide — A deep dive covering everything from material options and energy performance to installation and long-term upkeep.
Frequently Asked Questions
Q: Can I install a roof myself, or do I need pros?
A: If you’re cool with heights, safety gear, local codes, and have mad DIY skills, you can DIY—but one slip and you’re paying way more in repairs (and hospital bills). Hiring a licensed crew usually pays off in speed, warranty, and peace of mind.
Q: What’s the single biggest rookie mistake?
A: Skipping underlayment overlap or reusing old flashing. Water will exploit the tiniest gap—guaranteed.
Q: How long before I see ROI on a new roof?
A: Energy savings and curb appeal start day one. Expect full payback through lower energy bills and higher resale value in 7–12 years, depending on your market.
Q: Does climate affect material choice?
A: Yes. ENERGY STAR® recommends metal or clay tiles in hot climates and impact-resistant asphalt shingles in hail-prone areas.